How to Install a Restaurant Hood: A Step-by-Step Guide
Are you a new restaurant owner, a budding young chef, or simply curious about kitchen ventilation systems? You’re in the right place if you’re pondering, “How to install a restaurant hood?” This article is your go-to resource for answering this question and delving into many other crucial aspects.
Focusing on clarity and practical insights, we make the complex world of kitchen ventilation systems easy to navigate.
So, let’s get cooking on this topic!
How to Install a Restaurant Hood?
How to Install a Restaurant Hood? Installing a restaurant hood is more than just a technical task; ensuring a safe and efficient kitchen environment is essential. The process involves:
- Selecting the right hood type.
- Adhering to local regulations.
- Installing and connecting the hood to ductwork.
- Wiring the electrical system.
- Incorporating a fire suppression system.
But wait, there’s more to this story.
This article will cover everything you need to know about the intricacies of “how to install a restaurant hood.” From understanding the types of hoods suited for your culinary needs to navigating the maze of local codes and regulations, we’ve got you covered.
Stay with us as we dive deeper into this topic, offering you valuable insights and practical tips tailored for new restaurant owners, young chefs, and anyone eager to master the art of kitchen ventilation installation.
Why a Restaurant Hood Installation is Crucial for Your Kitchen
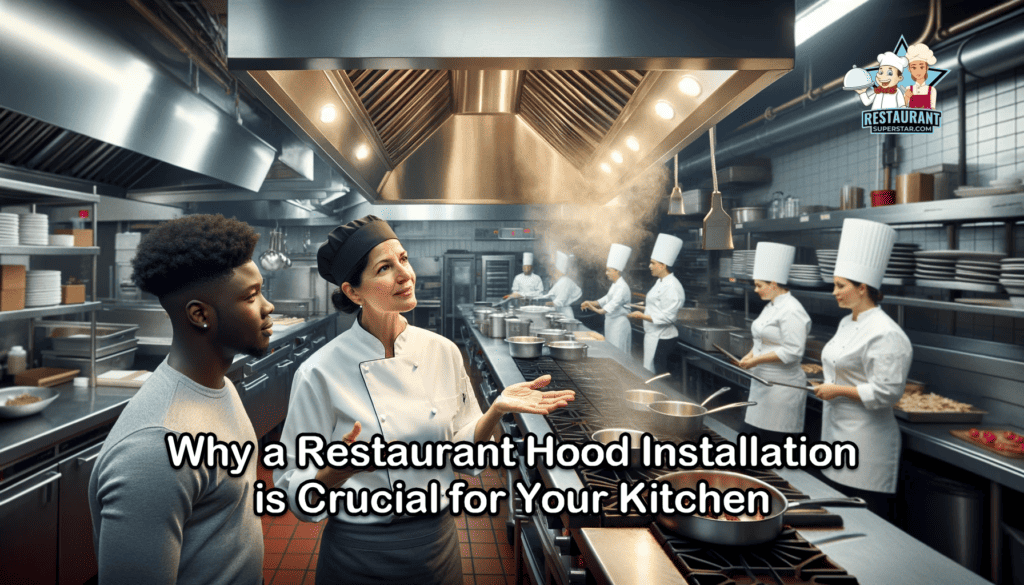
Imagine your restaurant kitchen as the heart of your culinary dreams. Just like a heart needs a healthy environment to function, your kitchen needs a proper ventilation system – and that’s where a restaurant hood comes in.
It’s not just a metal box hanging over your stove; it’s a guardian angel that keeps your kitchen air clean, removes excess heat, and protects you from fire hazards.
Compliance is Key
Dealing with regulations might sound as fun as watching paint dry, but stick with me here. Complying with local codes and safety standards is more than just a bureaucratic checkbox.
It’s about ensuring that your kitchen is safe for your culinary creations. These codes cover everything from the type of hood you need, based on what you’re cooking, to the nitty-gritty of installation. Ignoring these can lead to safety hazards, hefty fines, or even closure – no one wants that!
Quick List of Must-Knows
- Local Building and Health Codes: Check with your local authorities. They’ll give you the rundown of what’s expected in your area.
- Fire Safety Standards: Playing with fire in the kitchen should only be symbolic.
- Ventilation Regulations: Proper airflow is about comfort, safety, and efficiency.
- Professional Help: Unless you’re a jack-of-all-trades, hiring a pro for installation can save you many headaches.
By focusing on these aspects, you’re setting up your restaurant for success and ensuring your team’s and customers’ safety.
And hey, a well-ventilated kitchen means a more comfortable working environment – that’s a win for everyone!
In the following sections, we’ll break down each step of the installation process. So, whether you’re a seasoned pro or starting, you’ll have all the info you need to get your restaurant hood up and running smoothly.
1 – Planning and Preparation
Understanding Local Codes and Regulations
Starting a restaurant is an exciting journey. I’m here to guide you through one of the first and most crucial steps: understanding and complying with local codes and regulations for installing your restaurant hood. It might sound daunting, but trust me, it’s easier than perfecting your grandmother’s secret recipe!
Why Bother with Codes and Regulations?
These codes and regulations are the recipe for a safe and legal kitchen. Just like you wouldn’t ignore a key ingredient in a dish, you must follow these guidelines when setting up your kitchen. They ensure your kitchen is a haven for culinary creativity and a safe space for you, your team, and your guests.
Fire, Building, and Health Codes – The Trifecta of Safety
- Fire Codes: These are your frontline defense against potential kitchen fires. They specify what kind of fire suppression systems you need and how your vent hood should handle grease-laden vapors.
- Building Codes: These focus on the structural aspects, like how your hood is installed, and ensure everything is up to par to handle the rigors of a busy kitchen.
- Health Codes: They ensure your kitchen environment is hygienic and safe for food preparation, directly impacting the well-being of your staff and patrons.
Getting the Right Advice
- Consult Fire Marshals and Health Inspectors: They’re the experts and can provide valuable insights about your location. Building a good relationship with them can make your restaurant journey smoother.
- Hire a Professional Consultant: If you want to get it right first, consider hiring a professional specializing in kitchen ventilation systems. They can help you navigate these codes like a pro.
Quick Checklist
- Research local regulations and codes.
- Schedule consultations with local fire marshals and health inspectors.
- Consider hiring a professional for guidance.
You’re laying a solid foundation for your kitchen’s success by tackling these steps head-on. It’s not just about passing inspections; it’s about creating a safe, efficient space where your culinary dreams can thrive.
In the next part, we’ll dive into selecting the fitting hood for your kitchen – it’s not just about size but about matching your cooking style and needs. Stay tuned!
2 – Selecting the Appropriate Hood Type
Now that you’re up to speed with the local codes and regulations, let’s talk about choosing the fitting hood for your kitchen. Think of this as picking the perfect hat – it must fit well and serve the proper purpose. In restaurant hoods, we mainly deal with three types: Type I, Type II, and Exhaust Canopies. Let’s break these down:
Type I Hoods: The Heavy-Duty Players
- Best For: High-heat, grease-laden cooking methods. We’re talking about charbroilers, deep fryers, grills, etc.
- Why Choose It: These hoods are designed to handle the intense heat and grease that come with heavy cooking. They have grease filters and are built to accommodate fire suppression systems.
- Ideal for: Restaurants focusing on fried foods, grills, or any cooking style heavy on oil and smoke.
Type II Hoods: The Versatile Performers
- Best For: Lighter cooking equipment that produces steam, heat, and odors but not much grease. Think ovens, pasta cookers, and dishwashers.
- Why Choose It: They’re designed to capture and remove excess heat and steam, keeping your kitchen comfortable and compliant.
- Ideal for: Bakeries, cafes, or any kitchen where the cooking is less grease-intensive.
Exhaust Canopies: The Generalists
- Best For: General ventilation over non-grease-producing equipment like steamers, kettles, and coffee makers.
- Why Choose It: They’re excellent for kitchens where heavy grease isn’t a factor, but ventilation is still necessary.
- Ideal for: Coffee shops, sandwich shops, or kitchens where steam is more of a concern than grease.
Factors Influencing Your Choice
- Cooking Style and Equipment: Match the hood to your cooking type. More grease and smoke? Go for Type I.
- Kitchen Layout: Consider the space and configuration of your kitchen. Each hood type has its spatial requirements.
- Budget Constraints: There’s a cost difference between these types. Factors in installation and maintenance costs are also factors.
- Local Regulations: Some areas might have specific requirements for hood types based on the cooking style or equipment used.
Remember, picking the right hood type is crucial for safety and efficiency. It’s like choosing the right pair of shoes for a marathon – the right fit makes all the difference!
The following section will dive into the nitty-gritty of obtaining necessary permits. Yes, it’s paperwork time, but I promise to make it as painless as possible!
3 – Obtaining Necessary Permits
Now, let’s navigate the world of permits. Think of licenses like the golden tickets to your restaurant’s grand opening. They are essential, and skipping this step could lead to some real headaches. It’s about ensuring everything is above board and safe.
Why Permits Matter
Permits are like a seal of approval from your local authorities. They confirm that your plans meet safety standards and legal requirements. This isn’t just red tape; it’s about protecting your business, team, and customers. Plus, having all your permits in order can save you from costly fines and delays later.
Typical Permits You Might Need
- Building Permit: This is a biggie. It’s usually required if you’re making structural changes to your space, like installing a new hood and ductwork. Your local government says, “Yep, you’re good to build this.”
- Electrical Permit: Planning to wire a new hood? You’ll likely need this permit. It’s crucial to avoid improper electrical work in a busy kitchen.
- Mechanical Permit: This covers installing mechanical systems, such as ventilation and exhaust systems. It’s about ensuring these systems are up to code and won’t cause any issues.
- Fire Safety Permit: This is especially important if your hood installation includes fire suppression systems. Safety comes first, always.
Getting Your Permits
- Contact Your Local Building Department: They are your go-to resource for permits and how to get them. Each area has different requirements, so getting the specifics is essential.
- Submit Your Plans: You’ll likely need to submit detailed plans of your proposed installation. This is where having a professional on your side helps.
- Be Patient: The permit process can take time. Use this period to plan other aspects of your restaurant.
Getting permits might feel like a chore, but it’s a crucial step in setting up your restaurant’s kitchen. It’s all about ensuring your dream kitchen is safe, legal, and ready to wow your customers.
Up next, we’re going to talk about the actual installation process. We’re approaching making your kitchen dreams a reality, so stay tuned!
4 – Installation Process
Preparing the Mounting Location
Let’s roll up our sleeves and get into the installation process. First up, we need to prepare the mounting location for your hood. This is like laying the foundation for a house; it needs to be done right to support everything that comes after.
Why Proper Mounting Matters
The way your hood is mounted is critical. It must support the hood’s weight and any additional forces from the ventilation system. Plus, it has to be in the right spot to effectively capture smoke, heat, and grease.
Steps to Prepare the Mounting Location
Evaluate Your Ceiling Structure
- Check if your ceiling can handle the weight of Type I and II Hoods. You should reinforce it.
- Look for joists or beams that can provide support. Sometimes, additional framing is necessary.
Constructing a Roof Curb (For Rooftop Installations)
- A curb is essential if you’re mounting the exhaust fan on the roof. It’s like a sturdy platform for your fan.
- The curb should be weatherproof and able to support the weight of the fan and any ductwork.
Ensuring Proper Alignment
- Your hood should be centered precisely over the cooking equipment.
- Use a level to ensure it’s perfectly horizontal. Even a slight tilt can affect its efficiency.
Preparing for Ductwork
- Plan the route for your ductwork. Avoid long runs and sharp bends for better efficiency.
- Consider the path for ductwork through the ceiling or walls. You might need to cut through these, so plan carefully.
Safety Precautions
- During construction, always prioritize safety. Wear protective gear and ensure the work area is safe.
- If you’re uncomfortable with this step, calling in a professional is okay.
Every kitchen is unique so that these steps might vary based on your specific layout and requirements.
It’s better to take your time and do it right than rush and face problems later.
Ensuring your perfectly prepared mounting location sets the stage for a smooth installation process. Next, we’ll discuss installing the hood and ensuring it’s done right.
5 – Installing the Hood
Now that we’ve got the mounting location prepped, it’s time to install the hood. This step is like the heart of our installation process – it must be done with precision and care.
The Art of Lifting and Securing the Hood
Installing a restaurant hood isn’t a one-person job. It’s heavy, and it’s bulky. Here’s how to tackle it:
- Assemble Your Team: You’ll need a few sets of hands. Please make sure everyone involved knows their role and understands safety procedures.
- Gather the Right Tools: A lifting device (like a forklift or a hoist) can be a game-changer. Also, have your drills, screws, and levels ready.
- Lifting the Hood: Carefully lift the hood to the mounting location. This must be a slow and controlled process to avoid damage or accidents.
- Aligning and Leveling: Once the hood is in place, take your time to ensure it’s perfectly aligned with your cooking equipment. Use a level to check that it’s not tilted.
- Securing the Hood: Now, it’s time to anchor it. Use the appropriate hardware for your ceiling type. If you need more clarification, consult a professional. The hood must be securely attached to prevent any movement or vibration.
Why the Right Hardware Matters
- Safety: The correct anchoring and hardware ensure that the hood stays firmly in place, which is critical for safety.
- Durability: Proper installation with suitable materials means your hood will stand the test of time, even in a bustling kitchen.
A Few More Tips:
- Read the Manufacturer’s Instructions: Every hood model might have specific requirements. Always check the manual for any special instructions.
- Double-Check Everything: Once installed, give everything a once-over. Better safe than sorry.
- Don’t Hesitate to Seek Help: Get a professional involved if you’re ever in doubt. It’s better to invest in expert installation than to risk improper setup.
Congratulations, your hood is now in place! But our journey doesn’t end here. Next, we’ll cover how to connect the ductwork and ensure your kitchen ventilation is top-notch.
6 – Connecting Ductwork
With your hood securely in place, it’s time to focus on the ductwork. This network carries all the smoke, heat, and grease-laden air away from your kitchen, so getting it right is essential.
Installing Fire-Rated Ductwork
- Choose the Right Ductwork: Make sure you use fire-rated ductwork. This is non-negotiable as it’s designed to withstand high temperatures and reduce fire risks.
- Measure and Cut: Measure the distance from your hood to the exhaust fan location. Plan the most direct route possible, avoiding unnecessary bends or long runs, which can reduce efficiency.
- Securing and Sealing: Assemble the ductwork pieces, securing them with appropriate fasteners. Then, seal all joints with a high-temperature, grease-resistant sealant. This prevents any leaks, which are both a safety and efficiency concern.
Cutting Through Walls or Ceilings
- Safety First: Before cutting, make sure there are no electrical lines, plumbing, or other hazards in the area you’re planning to cut.
- Use the Right Tools: A reciprocating or drywall saw can be handy for this job. Hiring a professional might be a good idea if you need to become more experienced with these tools.
- Clean Cuts: Measure twice and cut once. Keep your cuts as neat and precise as possible for a professional finish and easier installation.
- Support Structures: Do not compromise structural integrity when cutting through walls or ceilings. If in doubt, consult with a structural engineer.
Quick Tips:
- Keep it Clean: Regular ductwork cleaning is crucial for safety and efficiency, so consider easy access during installation.
- Follow Local Codes: Ensure your ductwork installation complies with all relevant building and fire codes.
- Inspection: Once installed, have your ductwork inspected by a professional to ensure it meets all safety standards.
By following these steps, you’re ensuring that your restaurant hood system will function effectively and safely. Up next, we’ll tackle the electrical aspects of the installation – connecting the hood to your kitchen’s power supply.
7 – Wiring the Electrical System
Great job on getting the ductwork set up! Now, let’s electrify things – quite literally. Wiring the electrical system of your restaurant hood is a task that demands attention to detail and strict adherence to safety standards. It’s not just about making things work; it’s about ensuring they work safely.
Adhering to Electrical Codes and Safety Standards
- Know the Codes: Before you start, familiarize yourself with the local electrical codes. These codes ensure your electrical system is safe and compliant, reducing fire or electrical hazard risks.
- Hire a Licensed Electrician: Unless you’re experienced in electrical work, I strongly recommend hiring a professional. They know how to navigate complex wiring and adhere to all safety codes.
Importance of Proper Grounding
- What is Grounding? In simple terms, grounding is a safety feature that helps prevent electrical shocks and fires. It provides a path for electrical current to be safely absorbed by the earth in case of a fault.
- Why It’s Crucial: Properly grounding your hood’s electrical system is essential for safety. It protects your kitchen staff and equipment from electrical hazards.
Installing Safety Switches
- Circuit Breakers and Fuses: These are your first defense against electrical overloads. Make sure your system includes these safety features.
- Emergency Shut-off: Consider installing an emergency shut-off switch for your hood and associated equipment. In a crisis, quickly cutting power can prevent accidents and injuries.
Steps for Safe Electrical Work
- Plan Your Circuit: Determine the power requirements of your hood and any associated equipment. Make sure your electrical panel can handle the load.
- Run Conduit and Wiring: Use conduit to protect your wiring and run it from your electrical panel to the hood. Follow the most direct and safe route.
- Connect Switches and Outlets: Install any switches and outlets according to your plan, ensuring they are easily accessible.
- Test the System: Once everything is connected, test your electrical system to ensure it works properly and safely.
Electrical work in a commercial kitchen is no DIY project. The risks are too high for on-the-job learning.
Following electrical codes isn’t just about passing inspections – it’s about ensuring the long-term safety of your restaurant.
With the electrical system adequately wired, you’re one step closer to a fully functional and safe kitchen. Next, we’ll discuss installing the fire suppression system, an integral part of your kitchen’s safety measures.
8 – Installing the Fire Suppression System
Moving on to a critical component of your kitchen’s safety: the fire suppression system. In many places, having a fire suppression system in your commercial kitchen isn’t just a good idea—it’s a legal requirement. This system is your first line of defense against fires, a crucial safety feature for any kitchen.
Why a Fire Suppression System is Essential
- Safety First: Kitchen fires can escalate quickly, especially with high-heat cooking methods. A fire suppression system can extinguish flames rapidly, preventing disasters.
- Legal Compliance: Many jurisdictions mandate these systems in commercial kitchens. They’re not just for peace of mind; they’re a legal requirement to protect your staff, customers, and business.
Steps for Installing a Fire Suppression System
- Choose the Right System: There are different fire suppression systems, so pick one suitable for your kitchen’s specific needs and layout.
- Professional Installation: This is a job for professionals. A certified technician will know how to install the system correctly, ensuring it functions as intended during an emergency.
- Integration with the Hood: The fire suppression system is typically installed within the hood. Nozzles are positioned to cover all risk areas, and the system is connected to a control box.
- Link to the Power Source: The system should automatically shut off the fuel or power supply to the cooking equipment in case of fire. This helps prevent the fire from spreading.
- Test the System: After installation, the system must be thoroughly tested to ensure it’s working correctly. The installing technician usually does this.
Regular Maintenance and Inspections
- Regular Checks: Routine inspections and maintenance are crucial. This ensures your system remains in top working order, ready to act if needed.
- Keep Records: Maintain a log of all inspections and maintenance. This is important for both safety and compliance.
Installing a fire suppression system is more than just a checkbox in your setup process. It’s a vital investment in the safety and longevity of your restaurant.
Regular training for your staff on how to respond in case of fire is equally important. Everyone should know what to do when the fire suppression system activates.
With the fire suppression system installed, you’re significantly boosting the safety of your kitchen.
9 – Testing and Inspections
Testing the Ventilation System
Congratulations on making it this far! You’ve installed your hood, connected the ductwork, wired the electrical system, and set up your fire suppression system. It’s time for a critical step: testing the ventilation system. This is where you ensure everything works perfectly to keep your kitchen safe and comfortable.
Ensuring Proper Airflow and Exhaust Capacity
- Why It Matters: Proper airflow removes smoke, heat, and cooking odors. It also ensures that your fire suppression system will work effectively in an emergency.
- Using Specialized Equipment: Testing the ventilation system often requires specialized equipment, like anemometers, to measure air velocity and ensure your system meets the required standards.
- Checking for Leaks: Examine the entire ductwork length for leaks. Even small leaks can significantly reduce the efficiency of your system.
- Balancing the System: Your ventilation system should be balanced. This means it should be capable of removing the same amount of air from the kitchen as is being brought in. An unbalanced system can lead to negative pressure, causing issues like poor air quality or even trouble opening doors.
The Need for Professional Testing
- Complexity of the Task: Ventilation systems can be complex. It’s often best to hire a professional with the tools and expertise to accurately assess and adjust your system.
- Compliance with Regulations: Professional testing can ensure your system complies with local health and safety regulations.
Final Adjustments
- Making Tweaks: Based on the testing results, you may need to adjust the fan speed, ductwork, or hood to achieve optimal performance.
- A Continuous Process: Remember, a kitchen’s ventilation needs may change significantly if you alter the menu or kitchen layout. Regular testing and adjustments are essential.
With your ventilation system tested and tweaked, you ensure a safer, more comfortable environment for your team and guests. Next, we’ll cover the final step: scheduling inspections to get the official thumbs-up for your installation.
10 – Scheduling Final Inspections
You’re almost at the finish line! Your restaurant hood is installed, and the ventilation system is tested.
It’s time for the final yet crucial step: scheduling inspections to obtain official approvals. This is like getting a stamp of approval that your kitchen meets all the safety and health standards.
Why Final Inspections are Important
- Safety Verification: Inspections by fire marshals and health inspectors ensure that your installation meets all safety and health standards, protecting you, your staff, and your customers.
- Legal Compliance: Passing these inspections is often legally required to operate your restaurant. They’re not just a formality; they’re a necessity.
Steps to Schedule and Prepare for Final Inspections
Contact the Relevant Authorities
- Reach out to your local fire department and health department to schedule inspections. They usually have specific processes for this.
- Remember to check if other inspections are needed, like building or electrical inspections.
Review Your Installation
- Before the inspectors arrive, do a thorough review of your installation. Ensure everything is in place and functioning as it should.
- This is a good time to double-check your fire suppression system, ventilation balance, and electrical connections.
Gather Necessary Documentation
- Have all your installation records, permits, and other relevant documentation ready. Inspectors should review these.
- Include manuals and maintenance records for your hood and fire suppression system.
Prepare for the Inspection Day
- Ensure easy access to all areas the inspectors will need to check.
- It might help to have your installation contractor or a knowledgeable staff member present during the inspection to answer any technical questions.
Addressing Feedback
- Inspectors might point out areas that need adjustments. Be prepared to take notes and address these issues promptly.
- Sometimes, a follow-up inspection is required after making these adjustments.
After the Inspection
- Once you pass the inspections, you’ll receive official documentation or approvals. Keep these safe; you might need to present them in the future.
- Celebrate your success! Passing these inspections is a significant milestone in setting up your restaurant.
With the final inspections complete, you can confidently open your kitchen, knowing it’s a safe, compliant, and efficient environment. Here’s to the many delicious meals and happy customers in your future!
Conclusion
Congratulations on completing our comprehensive guide on “how to install a restaurant hood.” You’ve taken a deep dive into every critical aspect of this process, and now it’s time to recap and reflect on the journey.
A Recap of the Key Steps
- Planning and Preparation: You started by understanding local codes and choosing the right hood type – laying the groundwork for a successful installation.
- Installation Process: Next, you prepared the mounting location, installed the hood, connected the ductwork, and wired the electrical system – the nuts and bolts of the operation.
- Testing and Inspections: Finally, you tested the ventilation system and scheduled inspections to ensure everything was up to code and functioning correctly.
The Importance of Safety and Professional Assistance
- Safety is Paramount: One theme remained constant throughout this journey – the importance of safety. Every step in this process contributes to a safe kitchen environment, from fire suppression to proper ventilation.
- Seeking Professional Help: While this guide provides a thorough overview, remember that installing a restaurant hood involves complex, technical work. There’s no substitute for professional expertise, especially regarding electrical wiring or fire suppression system installation.
Your Kitchen, Your Pride
- Installing a restaurant hood is more than a technical task – it’s a commitment to quality, safety, and professionalism in your culinary venture.
- With your new hood installation, you’ve taken a significant step towards creating an efficient, compliant kitchen and a haven for culinary creativity.
Looking Ahead
- Keep this guide handy as a reference, but remember, your journey continues. Regular maintenance, staying informed about code changes, and continuous learning are part of the ongoing adventure of owning a restaurant.
You’re now equipped with the knowledge and insights to tackle this challenging yet rewarding project.
Jeff Smith is a Restaurant Consultant with over 20 years of hospitality experience ranging from server to owner and general manager. He focuses on Restaurant POS technology as well as restaurant marketing. Check out our world-famous restaurant resources page for a comprehensive offering of hand-picked resources and tools to help your business. You can also check out some of our other restaurant business articles.

