
How to Use Restaurant Dishwasher: A Step-by-Step Guide
You are in the right place if you’re wondering, “How to Use Restaurant Dishwasher?” This comprehensive guide will answer this pivotal question and delve into the nuances that make the process efficient and effective.
Suppose you’re a new restaurant owner, a young chef, or simply seeking to enhance your kitchen’s operational efficiency.
In that case, this article is tailored for you.
How to Use Restaurant Dishwasher?
How to Use Restaurant Dishwasher? Understanding the proper use of a restaurant dishwasher is more than just an essential skill—it’s a fundamental part of running a successful sanitary kitchen.
This guide provides a detailed overview of effectively using a commercial dishwasher.
We’ve covered everything, from preparing the machine to selecting the proper wash cycle, loading techniques, and regular maintenance.
And while this summary gives you the gist, the real treasure trove of information lies within the article.
We’re about to dive into the specifics that will answer your initial query and offer insights that could revolutionize how you handle your kitchen’s dishwashing needs.
Stay with us as we explore each step in detail, ensuring you’ll be well-equipped by the end of this article to use your restaurant dishwasher as efficiently and effectively as possible.
Get ready to turn a routine task into an expert skill.
In the bustling environment of a restaurant, ensuring that your dishes are spotlessly clean is not just a matter of presentation; it’s a cornerstone of food safety and kitchen efficiency.
Why Is It So Important?
Let’s break it down:
- Sanitation: First and foremost, a well-operated dishwasher is your best ally in the fight against germs and bacteria. It’s not just about making your plates shine; it’s about ensuring that every dish, glass, and utensil is hygienically safe for your customers. You’re not just washing dishes but safeguarding your patrons’ health.
- Efficiency: Time is a precious commodity in a restaurant kitchen. A commercial dishwasher, used correctly, is a time-saver. It means more dishes cleaned in less time, giving you and your staff more time to focus on creating those mouth-watering dishes that keep customers coming back.
- Equipment Longevity: Let’s face it: commercial dishwashers are costly. But when used and maintained correctly, they’re an investment that pays off in the long run. Knowing the ins and outs of your dishwasher ensures a consistent cleaning performance. It extends the life of your equipment, saving you money on costly repairs or replacements.
Whether you’re a new restaurant owner, a young chef stepping into the professional kitchen arena, or someone keen on mastering the art of commercial dishwashing, understanding how to use your dishwasher effectively is crucial.
It’s about combining the art of cleanliness with the science of efficiency. And that’s precisely what we’re here to help you with!
Stay tuned as we dive deeper into this step-by-step guide with practical tips and tricks to help you get the most out of your commercial dishwasher.
Let’s turn this routine task into a strategic advantage for your kitchen.
Preparing for Dishwashing
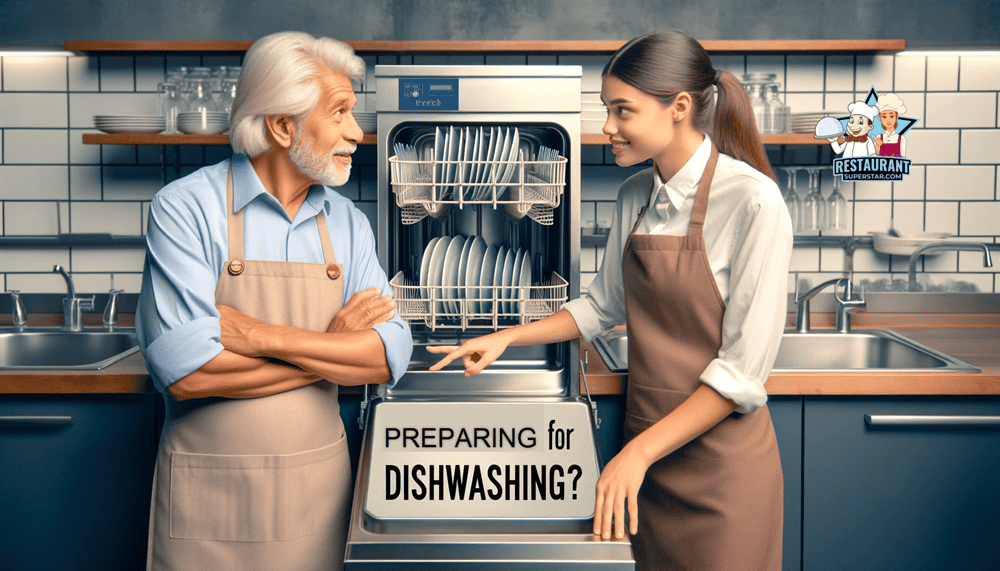
Getting ready to tackle a mountain of dirty dishes in your restaurant?
Perfect! The first step to mastering the art of using your commercial dishwasher is all about preparation.
It’s like setting the stage for a flawless performance.
Let’s get started:
Gather Necessary Items
Before jumping into the action, ensure you have all your dishwashing sidekicks. Here’s what you’ll need:
- Scraper: This little tool is a big hero. Use it to scrape off all the food scraps from the dishes. Remember, the cleaner the dish before it goes into the washer, the better the result.
- Dishwasher Detergent: Not just any detergent, but a commercial-grade one. This is specially formulated for the heavy-duty task of a restaurant dishwasher.
- Rinse Aid: Think of this as the finishing touch. Rinse aid works wonders in preventing those pesky water spots and helps in quicker drying.
- Sanitizing Agent: Safety first! A sanitizing agent is crucial to kill lingering bacteria and ensure your dishes are clean and hygienically safe.
Prepare the Dishwasher
Now that you’ve got everything you need, it’s time to set up your dishwasher:
- Check the Water Level: Ensure there’s enough water in the dishwasher. It’s like checking the oil in your car; it’s necessary for smooth running.
- Fill the Detergent Dispenser: Add the recommended amount of your chosen commercial-grade detergent. This is where the cleaning magic begins.
- Add Rinse Aid and Sanitizer: Follow the manufacturer’s instructions here. Correct amounts are vital to achieving those sparkling, spotless results.
Why This Matters
In the bustling world of restaurant kitchens, skipping these preparatory steps is like going into a battle without armor.
Preparing your dishwasher correctly sets the tone for the entire washing process, ensuring that every plate, glass, and utensil comes out clean, sanitized, and ready for your next culinary creation.
Loading the Dishwasher
Alright, your dishwasher is prepped and ready to go. Now, it’s time to load it up. But wait, there’s a method to this madness! Properly loading your dishwasher is like solving a puzzle – every piece has its place for maximum efficiency. Let’s break it down:
Scraping Dishes
Before anything else, make sure to scrape off all food scraps from the dishes. Why, you ask?
- Prevents Clogging: Those leftover bits can clog up the dishwasher’s system, leading to less efficient cleaning and potential maintenance headaches.
- Enhances Cleaning: The less food residue on dishes, the easier it is for the dishwasher to do its job thoroughly.
Loading Plates, Bowls, and Utensils
Now, for the actual loading:
- Plates: Place them on the designated racks, slightly angled and not overlapping. Think of it like filing papers; each plate should have its slot for the water jets to reach every surface.
- Bowls: These go on the top rack, ideally upside down, to avoid pooling water. Space them out evenly.
- Utensils: Mix them up in the utensil basket – forks with spoons, knives with spatulas. This prevents ‘nesting’ and ensures each item gets a thorough wash.
Avoiding Overcrowding
Last but not least, avoid the temptation to overcrowd the dishwasher. Here’s why:
- Ensures Proper Cleaning: Overcrowding can block water and detergent from reaching all surfaces. It’s like trying to wash your hands with gloves – not very effective.
- Prevents Damage: Crowded dishes can bump into each other during the wash cycle, leading to chips or cracks. Treat your dishes like party guests–give them space to mingle.
Loading your dishwasher correctly is crucial. It’s not just about cleaning the dishes; it’s about doing it efficiently and safely.
Remember, every item has its place; space is key to cleanliness.
Selecting the Wash Cycle
You’ve prepped your dishwasher and loaded it meticulously, and now it’s time to choose your wash cycle.
This is where you play the role of a strategist, selecting the proper cycle for the correct type of dishes.
It’s not just a button press; it’s a decision that affects the outcome of your dishwashing.
Let’s dive into how to make the best choice:
Cycle Selection Based on Dish Type
- Standard Cycle: This is your go-to for most dishes and glassware. It’s like the middle ground – not too harsh or gentle.
- Heavy-Duty Cycle: Got pots, pans, and heavily soiled dishes? This cycle is more intense and perfect for cutting through tough grease and food residue.
- Delicate Cycle: For your fine china or any dishes prone to damage, this gentler cycle takes care of them with kid gloves.
Considering Soil Level
The level of dirtiness on your dishes should guide your cycle selection:
- Lightly Soiled: A shorter or eco-friendly cycle should do the trick if the dishes have some light residue or have been pre-rinsed.
- Heavily Soiled: For dishes with dried or tough food remnants, opt for a longer wash cycle or a higher temperature to ensure everything comes out squeaky clean.
Why This Matters
Choosing the proper cycle is like picking the right tool for a job – it ensures efficiency and effectiveness. Using a cycle that’s too harsh for delicate dishes can cause damage, while a cycle that’s too mild for dirty pots won’t get them clean. It’s all about finding that perfect match between dish type and wash cycle.
Operating the Dishwasher
Great! Your dishwasher is loaded, and the perfect cycle is selected. Now, it’s showtime – let’s get those dishes clean.
Operating your dishwasher efficiently is crucial. It’s like being an orchestra conductor; every element must work harmoniously.
Here’s how you do it:
Starting the Dishwasher
- Close the Door Securely: Ensure the door is properly closed before hitting the start button. It’s like ensuring all windows are shut before a rainstorm; you want everything sealed.
- Initiate the Wash Cycle: Now, press the start button. Some dishwashers start automatically once the door is closed, so know your equipment.
Monitoring During Wash Cycle
While the dishwasher does its magic, keep an eye on a few things:
- Listen for Unusual Noises: Strange sounds, like a dish blocking the spray arm, can indicate something amiss.
- Check for Error Messages: Watch for error codes if your dishwasher has a digital display. They’re like little SOS messages from your machine.
- Watch the Cycle Progress: Some dishwashers have cycle progress indicators. It’s an excellent way to keep track of the cleaning journey.
Operating your dishwasher isn’t just about starting a cycle; it’s about ensuring everything runs smoothly.
Think of it as overseeing a critical part of your kitchen’s workflow. Proper operation prevents mishaps, saves time, and ensures your dishes arrive ready to impress.
Unloading the Dishwasher
The wash cycle has ended, and it’s time to see the fruits of your dishwasher’s labor. Unloading the dishwasher is the final step in this culinary cleaning journey. It’s like unwrapping a present – you’re eager to see the results. Let’s make sure everything is spotless and ready for your next service:
Inspection and Removal of Dishes
- Wait for the Cycle to Fully Complete: Patience is vital. Open the dishwasher only after the cycle has fully finished.
- Inspect for Cleanliness: Check the dishes for any leftover food particles or stains before unloading. It’s like doing a quality check to ensure everything meets your high standards.
- Unload Promptly: Remove the dishes as soon as possible to avoid any water spots or residues from drying on the dishes.
Dealing with Water Spots
Sometimes, you might encounter water spots on glasses or dishes. Here’s how to handle them:
- Use Rinse Aid: This is your first line of defense. Rinse aid helps reduce water spots, so make sure it’s always filled in your dishwasher.
- Wipe with a Soft Cloth: If you find water spots, gently wipe them with a soft, dry cloth. It’s a quick fix for that spotless shine.
- Adjust Water Hardness Settings: If your dishwasher allows, adjust the settings to cater to the hardness of your water supply, as this can impact spotting.
Unloading the dishwasher might seem straightforward, but it’s a crucial step in maintaining the highest level of hygiene and presentation.
Proper unloading techniques ensure that your dishes aren’t just clean and restaurant-ready.
It’s all about paying attention to those little details that make a big difference in professional food service.
Understanding Dishwasher Components
To truly master the art of using your restaurant dishwasher, it’s essential to understand its various components and their functions. Think of it like getting to know a key kitchen team member. Each part has a role in ensuring your dishes come out clean and hygienic. Let’s break down these key components:
Key Components and Their Functions
- Racks: These are where you place your dishes. Racks are designed to hold plates, glasses, and utensils in a way that allows water and detergent to reach every surface efficiently.
- Wash Pumps: These are the heart of your dishwasher. Wash pumps circulate water and detergent through the jets, ensuring every dish gets thoroughly washed.
- Rinse Pumps: After the wash cycle, rinse pumps take over, spraying clean water to remove any remaining detergent and food residue. This step is crucial for sparkling clean dishes.
- Heating Elements: In high-temperature dishwashers, these elements heat the water to the required sanitizing level. It’s like giving your dishes a hot bath to eliminate lingering germs.
- Chemical Dispensers: Found in low-temperature dishwashers, these dispense sanitizing agents into the water during the final rinse cycle. They ensure your dishes are not only clean but also hygienically safe.
- Drain Pumps: These work at the end of the cycle, removing dirty water from the dishwasher. It’s like the final curtain call, clearing the stage for the next performance.
Understanding the components of your dishwasher helps you troubleshoot issues, communicate effectively with maintenance personnel, and make informed decisions about its operation.
It’s about being in tune with your equipment, ensuring it performs at its best, and keeping your kitchen running smoothly.
Preparing the Dishwasher for Use
Before you start your dishwashing cycle, it’s crucial to ensure your machine is prepared correctly. T
his step is like setting the stage before a performance; everything must be suitable for optimal results.
Here’s how to get your dishwasher ready:
Loading Detergents and Rinse Aids
- Choosing the Right Detergent: Opt for a commercial-grade detergent that’s suitable for your type of dishwasher. Remember, the right detergent can make a significant difference in cleaning efficiency.
- Filling the Dispensers: Carefully fill the detergent and rinse aid dispensers according to the manufacturer’s guidelines. Overfilling or underfilling can affect the cleaning performance.
Filling the Water Tank
- Connecting to the Water Supply: Ensure your dishwasher is correctly connected to a water source.
- Checking Water Temperature: For effective cleaning and sanitization, it’s best to keep the temperature within the range specified by the manufacturer. Typically, that’s between 49°C and 82°C.
- Maintaining Water Levels: Keep an eye on the water level indicator. The water should reach the specified mark for your dishwasher to function efficiently.
Inspecting the Filters
- Locating and Removing Filters: Find the coarse, delicate, and flat filters. They’re usually easy to access and remove for cleaning.
- Cleaning the Filters: Rinse them under running water to remove any food particles or debris. This step is essential for preventing clogs and maintaining cleaning efficiency.
- Reinstalling the Filters: Make sure they are placed back correctly. Improper installation can lead to inadequate cleaning and potential damage to the dishwasher.
Preparing your dishwasher correctly is the foundation of a successful wash cycle. It ensures your machine works efficiently, saves resources, and provides the best cleaning results.
It’s an essential skill for any restaurant owner or chef who values hygiene, efficiency, and the longevity of their kitchen equipment.
Loading Techniques for Efficient Cleaning
Loading your dishwasher might seem straightforward, but doing it effectively ensures every item comes out sparkling clean.
It’s not just about fitting everything in; it’s about organizing each piece for maximum cleaning efficiency.
Let’s look at the best practices for sorting and arranging dishware and understanding the purpose of different racks and trays.
Sorting and Arranging Dishware
- Sort by Size and Type: Group similar items together. Plates with plates and cups with cups ensure that each item is exposed to the water jets properly.
- Pre-Treat Stubborn Stains: If you have dishes with dried-on food, give them a quick pre-soak. It makes the dishwasher’s job easier.
- Positioning Dishes: Face the dirtier side of dishes towards the spray arms. This ensures the most soiled parts get the most attention.
Understanding Racks and Trays
- Top Rack: Lighter items like glasses, cups, and small bowls are ideal. Space them out to prevent them from toppling and ensure water reaches inside each item.
- Bottom Rack: Designed for heavier items like plates, large bowls, and pots. Arrange plates in the slots vertically and space them evenly.
- Utensil Basket: Mix utensils to prevent them from ‘nesting’ and to ensure each piece gets cleaned. For safety reasons, it’s best to place sharp knives with the blade facing down.
Special Racks and Holders
Some dishwashers have special racks or holders for long utensils, small cups, or large pots. Use these features as they are designed to optimize cleaning for specific items.
Efficient loading is not just a time-saver but ensures that every dish, glass, and utensil gets cleaned effectively.
Understanding how to load your dishwasher correctly is a skill that saves resources, extends the life of your dishes, and maintains a high standard of hygiene in your kitchen.
Regular Maintenance and Troubleshooting
Maintaining your restaurant’s dishwasher is like caring for a valuable team member.
Regular upkeep ensures optimal performance and prolongs the machine’s life.
Plus, being on top of maintenance helps you nip potential problems in the bud. Let’s dive into the daily tasks, scheduled maintenance, and common troubleshooting tips.
Daily Cleaning Tasks
- Wipe Down the Interior: Use a damp cloth to clean the interior surfaces, including the door and gasket.
- Clean the Filters: Remove and rinse the filters daily to prevent clogs and maintain efficiency.
- Inspect Spray Arms: Make sure the spray arms are debris-free and rotate freely.
- Clear the Drain: Check the drain area and remove any food particles or debris.
Scheduled Maintenance
- Regular Inspections: Schedule periodic inspections of hoses, gaskets, and seals. Look for any signs of wear or leaks.
- Professional Check-Up: Make sure to have a seasoned technician take a look at your dishwasher at least once a year. They can check for any possible issues and make any needed adjustments or repairs.
- Descale and Sanitize: Depending on your water hardness, descale your machine regularly to prevent lime scale buildup. Also, run a sanitizing cycle as recommended by the manufacturer.
Common Issues and Solutions
- Dishes Not Cleaning Properly: Check if the spray arms are clogged, ensure correct detergent usage, and verify that the dishwasher is not overloaded.
- Water Leaks: Inspect door seals and gaskets for damage. Check for loose or damaged hoses.
- Dishwasher Not Draining: Clear any blockages in the drain. Check the drain pump for any malfunctions.
- Strange Noises: Listen for unusual sounds, indicating trapped debris or a malfunctioning motor.
Routine maintenance and prompt troubleshooting keep your dishwasher in prime condition, consistently delivering clean, sanitary dishes.
It’s a crucial part of kitchen management that saves time and money in the long run. A well-maintained dishwasher is more efficient, contributing to a smoother-running kitchen.
Conclusion
As we wrap up our comprehensive guide on “How to Use Restaurant Dishwasher,” let’s take a moment to recap the best practices and emphasize the impact of efficient and hygienic operations on your restaurant’s success and customer satisfaction.
Summary of Best Practices
- Prepare Beforehand: Gather necessary items like detergent and rinse aid, and ensure the dishwasher is ready.
- Load Correctly: Use appropriate techniques for loading dishes, utensils, and glassware to ensure effective cleaning.
- Select the Right Cycle: Choose the wash cycle based on the dishes’ type and soil level.
- Operate Efficiently: Start the dishwasher correctly and monitor it for any issues during the wash cycle.
- Unload and Inspect: Promptly unload dishes after the cycle and inspect them for cleanliness.
- Understand Your Dishwasher: Familiarize yourself with its components and functions for better operation and maintenance.
- Regular Maintenance: Perform daily cleaning tasks and schedule routine professional check-ups to keep the dishwasher in top condition.
- Troubleshoot Proactively: Be prepared to address common issues to prevent significant malfunctions and downtime.
Final Thoughts on Efficient and Hygienic Operations
An efficiently run dishwasher is a cornerstone of a successful restaurant.
It’s not just about clean dishes; it’s about providing your customers with a safe, hygienic experience.
Each clean plate, glass, or utensil is a testament to your establishment’s commitment to quality and health standards.
Moreover, properly using and maintaining your commercial dishwasher translates into significant cost savings.
By avoiding frequent repairs and extending the lifespan of your machine, you’re making a wise investment in your business’s operational efficiency.
In conclusion, mastering your restaurant dishwasher is an invaluable skill.
It makes sure your customers stay healthy and safe, improves how efficiently your kitchen runs, and adds to the overall success of your restaurant.
By following these guidelines, you’re not just washing dishes but building the foundation of a thriving culinary enterprise.
Jeff Smith is a Restaurant Consultant with over 20 years of hospitality experience ranging from server to owner and general manager. He focuses on Restaurant POS technology as well as restaurant marketing. Check out our world-famous restaurant resources page for a comprehensive offering of hand-picked resources and tools to help your business. You can also check out some of our other restaurant business articles.